

Design Solutions
We often rely on familiar ways of working without realising how strongly they shape our designs. Design Solutions brings those habits into view. Across four practical tasks, work predominantly with two preferred materials and discover how deliberate use of design principles can extend your range of responses.

Recognising design habits
Familiar methods that support us can become automatic habits which restrict our choices as designers. When this happens, we may lose sight of the organising systems behind our work.
In Design Solutions, we work through four distinct tasks, each placing different constraints on how we apply design principles. Studying our work through the lens of those principles helps us understand our designs more clearly, strengthen our grasp of the principles and use them more consciously.

Working with two materials
Working predominantly with two materials removes the option of reaching for more colours, forms or textures whenever a design feels unresolved. Instead, we create visual interest through organisation, distribution, line direction, proportion and construction.
Using the same materials for four different tasks also asks us to explore their possibilities more fully. Flowers, leaves, stems, seed pods and bracts may behave differently when fresh, dried, separated or reassembled, so new possibilities continue to emerge.

Is this for me?
Design Solutions is open to floral designers from all traditions and levels of experience. You need enough familiarity with floral design to make a design using methods you already know; advanced technical mastery is unnecessary. The principles explored apply across floral art, floristry and flower arranging.
The program is unlikely to suit someone looking principally for technique-led demonstrations or step-by-step instructions for particular kinds of design. Its value depends on making the designs, sharing in the group's learning and taking part in the analytical process.

The strongest qualification is a willingness to work outside comfortable patterns for two months, using a very pared-back palette to examine the effects of your decisions and consider detailed feedback.
Everyone begins from a different point. Design Solutions does not rank one person's work against another's. We examine each design on its own terms and consider how successfully its decisions support the intended result. Design Solutions is for you if you will give each task time, stay with problems that may not yield an immediate solution, and learn from analysis of your own and others' work.
Four tasks, each testing something different
The four tasks form a progression. We begin with a familiar design context, then apply the same principles to changes in scale, function, form and material organisation. Across the sequence, the design principles remain consistent while the conditions in which we apply them change, so a solution that worked for one design can't simply be repeated for the next.
A Traditional Arrangement
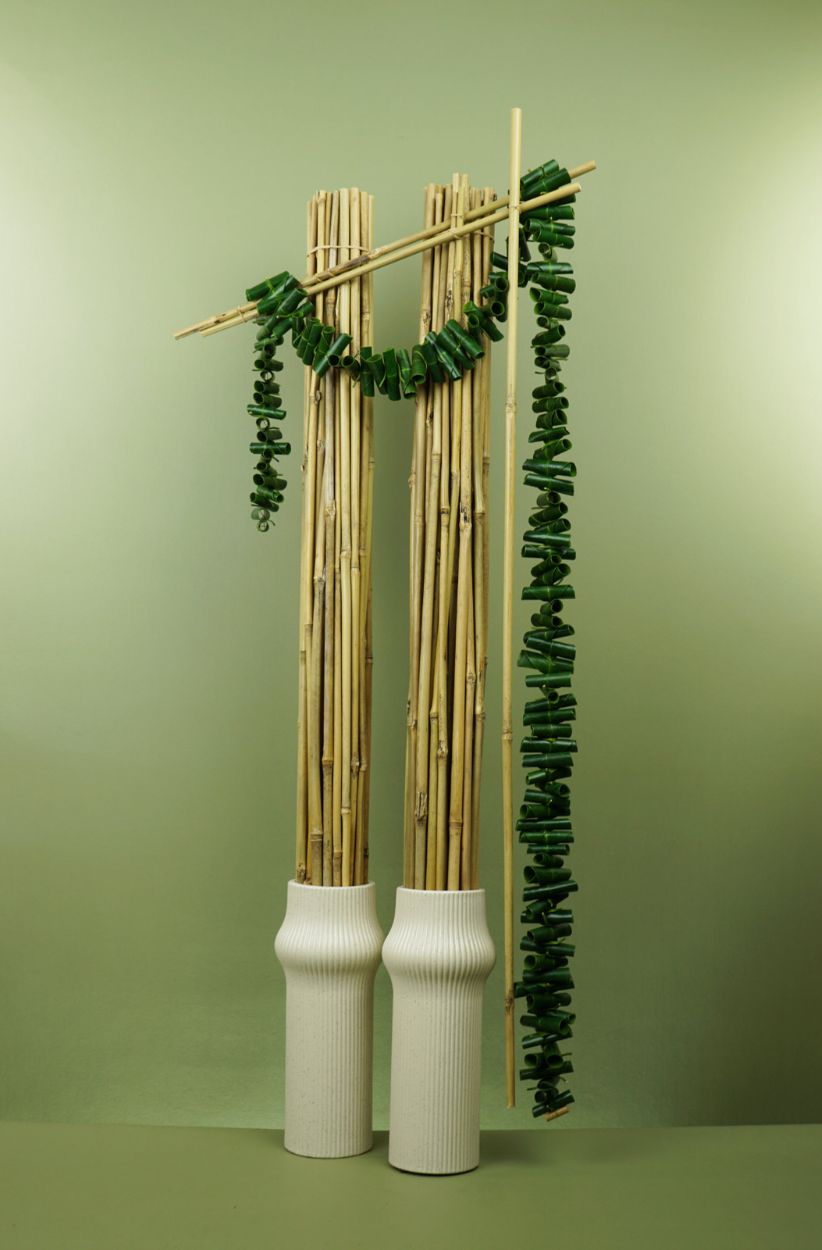
Our shared starting point is an arrangement with a traditional influence, a design context familiar to many of us. Traditional arrangements commonly use radial construction, symmetry or a recognisable geometric form, and one-thirds / two-thirds proportions. We may work closely within these conventions or use them selectively to give a contemporary design a traditional influence.
The task gives us a basis for examining the line systems, proportions and forms we already use, and brings some of our established habits into view.

A Bridal Design
Next we apply design principles to a human-scale object, placing proportion, distribution, focal areas and line direction in a new context: a bridal design that will be carried in the hand. It may take any form, but it must work in relation to the person carrying it.
Visual and physical balance are treated together, taking into account the position and angle of the handle, the relationship between the handle axis and the design's visual weight, and how the work serves the practical requirements of its use.
The design moves with the bride, may be seen from every direction, must be comfortable to hold, and definitely must not catch on their clothing. We're asked to consider how it functions as well as how it appears, so movement, safety and technical finish also become more important.
A Wreath
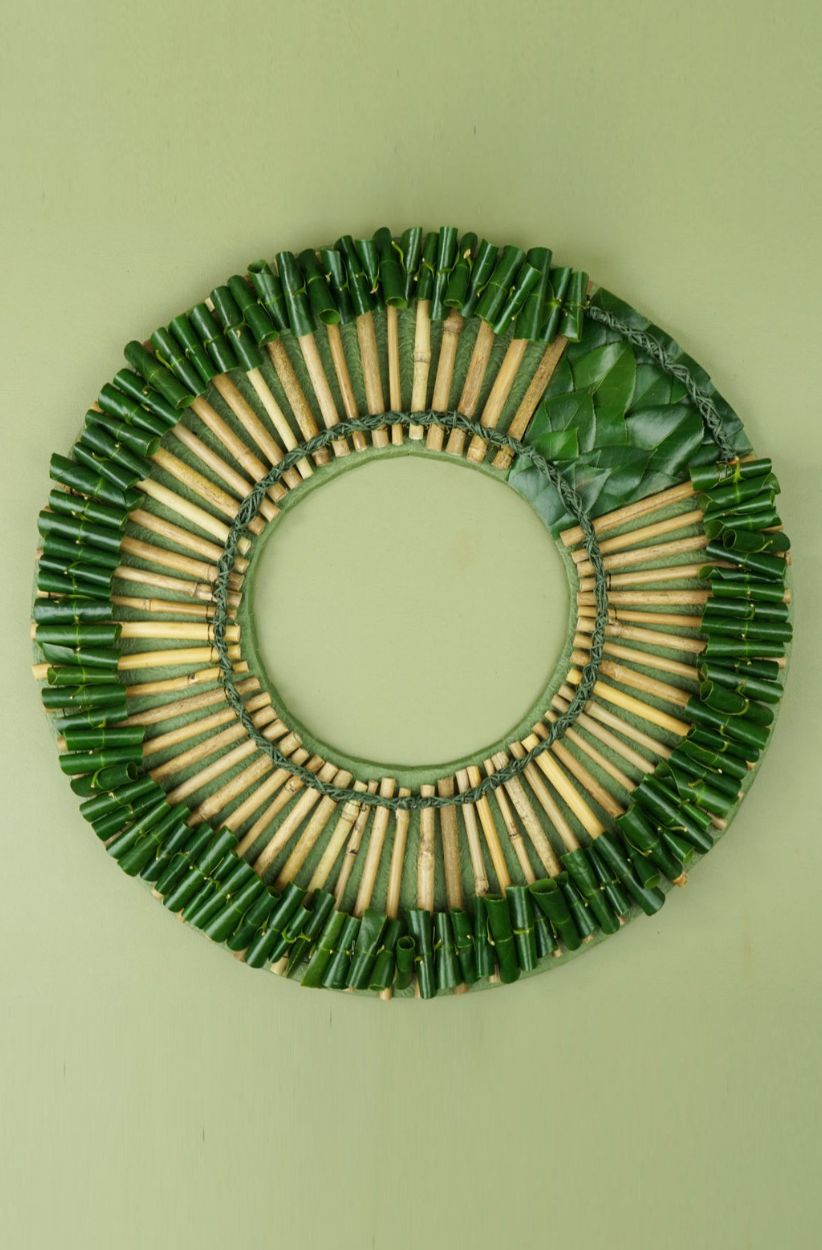
The third task returns to a contained form, a wreath, usually with a symmetrical outline and an area of negative space at its centre. Classical wreaths often use two-thirds positive space to one-third negative space, with materials distributed evenly or moving in a continuous winding direction.
These characteristics provide points of reference rather than fixed rules. We may vary the silhouette or the width of the wreath mass, interrupt its symmetry, alter the central space or introduce a contrasting focal area. Each decision affects whether the finished design continues to read as a wreath.
We're asked to examine the relationship between the exterior and interior silhouettes, positive and negative space, directional rhythm, depth and presentation — developing our understanding of a familiar form by testing how its defining parameters can be used, adjusted or stretched.
An Overlapping Design
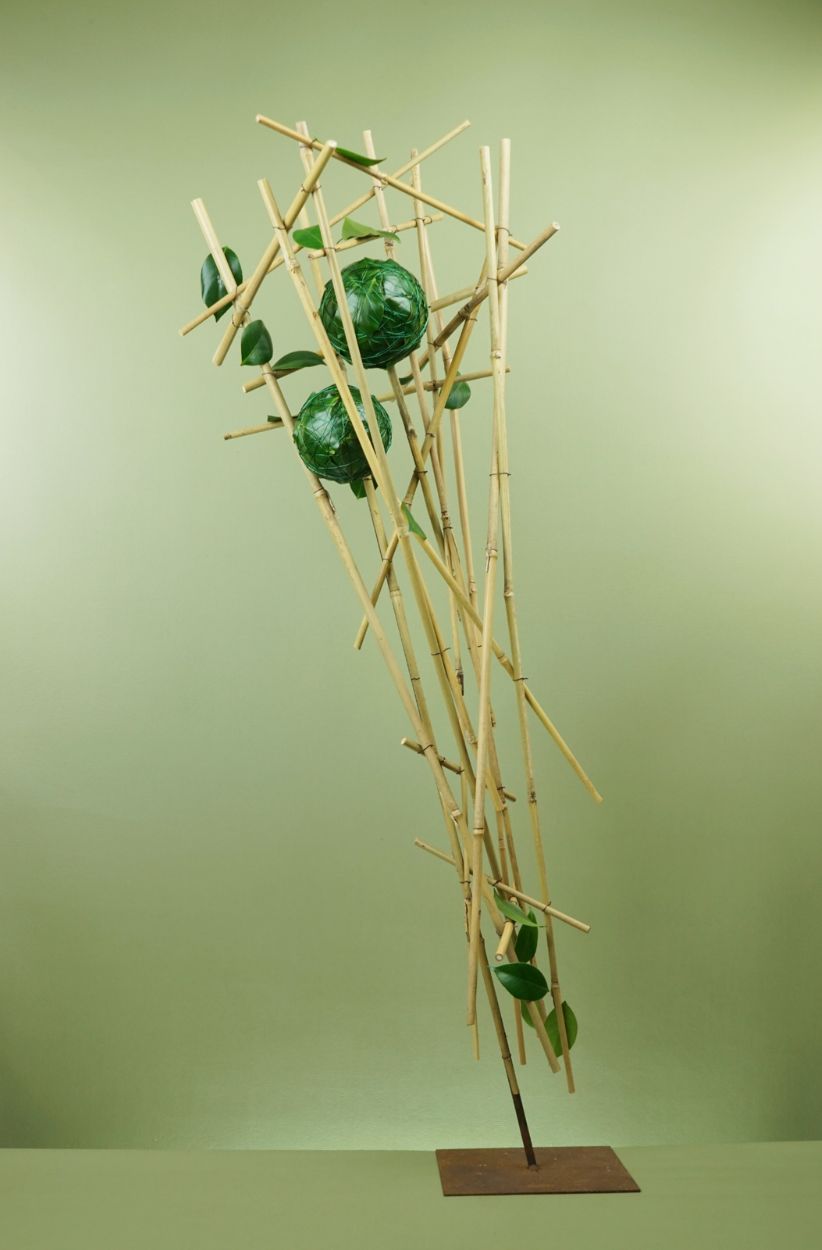
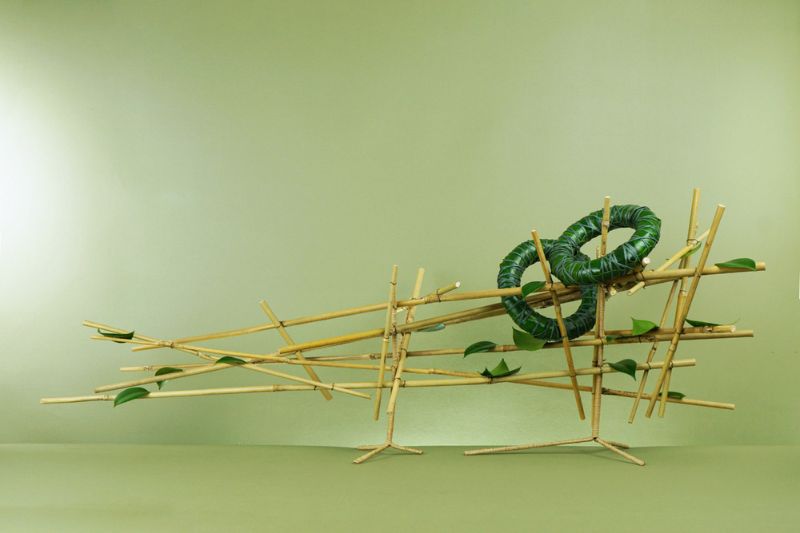
The final task uses overlapping as the dominant line system. The linear qualities of the materials are directed across one another so that the crossings become a foundational part of the design's organisation.
Overlapping systems can easily be undone by unconscious reversion to familiar line systems — for example, convergence toward a radial point, or alignment along parallel axes.
To make our overlapping design read clearly, we have to consider the distribution and density of the crossings, the direction in which individual materials face, the balance between open and concentrated areas, and the strength of the design's silhouette and access points. The task brings together the decisions examined throughout the course while asking us to work within the least familiar of the five organising systems.
How analysis and feedback work
Most discussion and shared learning takes place during the feedback and analysis in each class. Mark adapts the method to each task. Converting images to black and white reduces the influence of colour and helps reveal the designs' underlying organisation and core qualities.
Line, axis and shape overlays reveal structure, proportions, balance, focal points and distribution. Digital edits, accompanied by notes explaining the suggested improvements, allow direct comparison with the original and help us evaluate their effects.

What participants develop
A clear design personality emerges through the four tasks. When we place the designs together, we can see that the same person made all of them, along with growing confidence in the decisions made from the first task to the last. Repeat participants have shown more courage and confidence, and a greater willingness to take risks.
Participants describe being pushed creatively, re-evaluating how they approach floral design and changing how they think about and understand it. They also describe the sense of accomplishment that comes from solving design issues as they arise.
The timetable
Submissions are by email; Mark gives the details in the first meeting. Recordings and written notes are provided after every meeting.
Mark Pampling

Mark's approach has developed over decades of designing, teaching, competing and judging across different parts of the floral world. He treats design principles as practical tools for analysing what is happening, solving design problems and making deliberate decisions.
- I conceived Design Solutions in 2020 when fresh flowers were scarce. Leaving home to source materials was heavily restricted and I had to use literally whatever I had on hand. I've always valued resourcefulness, but even so, I found it challenging at first. I embraced the challenge and learnt that it gets easier with practice.
In Design Solutions he puts this approach into practice. Restricting some choices increases our dependence on design principles and makes the effects of our decisions easier to see. Mark helps us analyse those effects, understand relationships within the design and become more confident in finding our own solutions.
The principles apply across the floral traditions, styles and purposes we normally work within. We develop an understanding we can take back into our own work and use in our own way.
Before you decide
You don't need to have advanced technical or theoretical mastery. A working familiarity with floral design is enough. If you can make a floral design using methods you already know, you have enough experience to take part.
Most likely, yes. Everyone begins from a different point, and the course does not rank one person's work against another's. We examine each design on its own terms, looking at the decisions that have been made, their effects, and what can be learned from them. The real value comes from committing to the process, being willing to make “mistakes” and grow as you progress.
No, you don't. Design Solutions is open to people from different floral backgrounds, including floristry, floral art, flower arranging, competition and exhibition work, ikebana and other floral traditions. The design principles we work with apply across those different practices.
Your two chosen materials should remain predominant, but you can add other material when it is needed to make the design successful. The restriction is there to make us work more deliberately with the materials and design principles, not to prevent us from solving the design problem successfully. So there is definitely flexibility here.
We aim to work with the same two preferred materials across all four tasks. There is some flexibility, though. As the design problems change, staying with the same materials asks you to explore them more fully and discover different possibilities in their various parts.
Choose materials you can source repeatedly throughout the eight weeks and that give you room to explore. Look beyond the obvious flower or leaf: stems, seed pods, bracts and other parts, fresh or dried, can all extend what a material offers. Expensive or exotic material is unnecessary.
You can join the live sessions or just catch up with the recordings and detailed notes provided after every meeting. Attending live is worthwhile if you can, because it gives you the opportunity to ask questions and talk the work through with Mark and the rest of the group.
Allow approximately three to eight hours for each task. The tasks are spaced through the eight-week course so that you have time to think, make, photograph and submit each design before its review.
The basic hand tools that you probably already have on your bench — scissors, knives, snips and pliers — will generally suffice. For photographing your submissions, you will need a phone or basic digital camera, a plain background, a table or plinth if the design needs one, and reasonable light. See the guide for more.
A phone camera is fine. What matters is that the photograph represents the design as it really is, because the critique works from the image. Aim for a clear background and diffused light from more than one direction rather than a single strong light from the front and above. Try to leave a border of space around the design rather than a tight crop. Don't use filters, as they obscure the design's inherent qualities. Send one to five images, always including a full-outline shot.
You do not have to join every lesson live. Recordings and course notes are provided afterwards so you can catch up. Attending live gives you the additional opportunity to ask questions and take part in the discussion, but missing a meeting does not prevent you from continuing with the course.
It's okay. Sometimes life gets in the way, even of floral design. Continue with the course where you can. Depending on the timing, there may be an opportunity to complete the task later or submit it for whatever review is practicable. Missing one task doesn't mean you have to stop participating in the rest of the course.
You can, and it's entirely optional. If you see an opportunity to advance your learning by revising a design — either before submission or after feedback — you're encouraged to do so. Mark will always give you direct feedback on the revision so you can examine the effects of the changes, and where time allows, cover it in the next lesson too, so the group shares in the learnings.
Yes. Everyone in the class sees the submitted work because shared analysis is an important part of the learning process. Use of your work outside the class is separate. Flower Thinking may ask to feature participant work in our galleries, social media, campaigns or other public material, with attribution, but only with your permission.
Pricing is deliberately flat so the course is as affordable as possible for everyone, which means there are no discounts or group rates available.
If places remain, yes. Joining before the second lesson is easiest because there is still time to catch up with the introductory material and complete the first task. If you join later, the aim is to get you participating from the point you enter rather than create an unnecessary backlog.
Source your materials wherever you can. Your garden, a florist or wholesaler, friends, local growers and materials growing around you can all be useful sources. The roadside verge or a neighbour's paddock (with permission and observing the relevant laws!) can be a great resource. There's no expectation that you buy expensive or exotic flowers — resourcefulness is a key part of Design Solutions, and ordinary materials can provide plenty to explore.
There are no prescribed quantities of materials. Gather or buy enough to make the designs you intend. There's no expectation that the work should use large amounts of material — how you use your materials matters much more than variety or volume. Exploring different parts and states of the same two materials can also significantly widen your range of design possibilities.
Use any construction method or mechanics you're comfortable with to make the design work for you. You can use techniques you already know or experiment with something new if that is useful. The construction does not need to be elaborate; choose mechanics that allow you to concentrate on solving the design problem. You can also use pre-existing items such as baskets, wire frames or structures salvaged from old designs in your workshop. Use what works for you.
Absolutely. This is often the time when asking a question is most needed. If something in a brief is unclear, you are unsure about a design decision, or you encounter a problem while working, email Mark. Questions between sessions are part of the way Design Solutions works, and you'll always get a response as soon as practicable.
You submit your designs by email. Photograph your completed design and send the images before the meeting in which the task will be reviewed. Please try to allow a full two days (48 hours) before the meeting, to give time to study and respond to your designs. The practical details of submission, including the email address and timing, are provided in the first session.

The Guide
The Guide explains how Design Solutions works in practice and provides information you can refer to as you prepare and progress through each task.
Use it to check the course dates and meeting format, prepare your materials and mechanics, photograph and submit your work, and represent your designs fairly during review.
It also covers photographing and submitting your work, and tips to ensure your designs present well for review.
Reserve your place
Eight places, eight weeks
Five live sessions, four practical tasks, feedback on every design.
Design more intentionally
Recognise the habitual choices shaping your designs, and see the organising systems at work within them.
Across four practical designs, work deliberately with familiar materials, make more considered decisions and discover greater resourcefulness in what you already have.
Individual feedback helps you evaluate and revise your work, so you can see more clearly what your decisions achieve.
As the designs develop, your own design personality begins to emerge more clearly.
- Five live online sessions, recordings and written notes to return to throughout Design Solutions
- Read the Guide for tips on how to prepare, photograph and submit your work, and how each task is reviewed.